Hot N’ Spicy Chicken Wings
We all love spicy chicken; except if you are allergic or you just can’t love spicy food. Being a chicken lover myself, I have collected 3 hot n’ spicy recipes for you to try out in your chicken today or anytime you would like to treat yourself for a deeelicious meal; they make good family specials as well! Although they have similar names, they are very different. Perhaps their origins differ.
#1. Hot Chicken Wings
Ingredients:
1 lg. can Parmesan cheese
2 tbsp. oregano
4 tbsp. parsley
1 tsp. salt
1 tsp. pepper
1 stick margarine
4-5 lbs. chicken wings
Directions:
Line cookie sheet with aluminum foil. Melt margarine in small pan. Cut up chicken wings. Discard tips. Mix all dry ingredients in bowl. Dunk chicken wings in margarine and roll in cheese mixture. Place on cookie sheet. Bake in preheated 350-degree oven for 1 hour. Serve warm.
#2. Hot Chicken Wings
Ingredients:
Chicken wings
1/2 stick margarine
1 bottle Durkee hot sauce
2 tbsp. honey
10 shakes Tabasco
2 tsp. cayenne pepper (optional)
Directions:
Deep fry wings for 20 minutes. Drain and dip and let set in sauce. Take out to dry and then serve.
#3. Hot-N-Spicy Chicken Wings
Ingredients:
5 lbs. bag chicken wings (drumettes)
12 fl. oz. Louisiana Pre Crystal Hot Sauce
1-2 sticks butter
Directions:
Fry chicken wings until golden brown and drain on paper towel. Mix hot sauce and melted butter and pour into deep pan or crock pot. Add chicken wings to sauce and heat thoroughly.
US Cuisine Related Articles
Perfect Scrambled Eggs
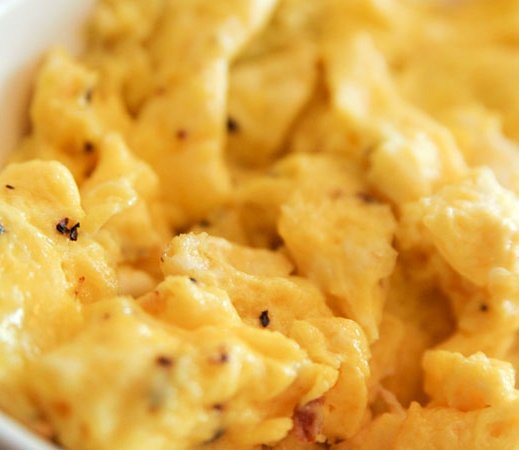
The truth is that scrambled eggs are easy to make. Unfortunately, they are also the easy to make wrong. At a root level, scrambled eggs are simply beaten eggs which are fried and – for lack of a better word – scrambled. Like most things that are simple (take love and martinis as examples), people have found ways to make them needlessly complex. No cheese. No overt flavorings. Just eggs and what it takes to make them taste and look like great eggs.
What NOT to add
Cottage Cheese: Several recipes I encountered recommended whisking a Tablespoon of small curd cottage cheese in with each egg. Visually, the result was creamy and mildly fluffy scrambled eggs. In terms of taste, the cottage cheese did not contribute or detract from the eggs — but it did make the dish seem somehow impure. You knew there was something in there besides the egg. The aspect of cottage cheese that secured its fate as a stay-out-of-our-scramble ingredient was that no matter how vigorously you whisked the dish had texture irregularities. Every other bite had the unwelcome surprise of a noticeable cottage cheese curd.
Real Cream: I tried two recipes that used real cream (“the fat skimmed off the top of raw milk” as defined by the Wikipedia Dairy Products Guide). One said to add 1 Tablespoon of real cream per egg. The other instructed the use of 1 and ½ Tablespoons of cream per egg. Both recipes created beautiful eggs with a creamy yellow color. Sadly, the resulting flavor was not so beautiful. In both cases the first bite tasted terrific, but the more I ate the more I had to admit that these eggs were just too creamy. The recipe with 1 and ½ Tablespoons of cream left a slight, unpleasant milky after-taste.
Sour Cream: Scrambled eggs with sour cream can not be considered scrambled eggs in a purist sense. The sour cream adds a distinct flavor. Therefore, scrambled eggs with sour cream will be saved for mention in a future article on specialty or flavored scrambled eggs.
Baking Powder: Scrambled eggs with a pinch of baking powder per egg had a great appearance. They were fluffy, yet firm. I was surprised to find there was no trace of baking powder taste. Unfortunately, the texture of the scramble in the mouth was uneven with specks of firmer pieces in a single bite.
Sea Salt: When salt is heated it breaks down to the same components regardless whether its table salt or sea salt. As Robert Wolke says in his book What Einstein Told His Cook, “…when a recipe specifies simply ‘sea salt’ it is a meaningless specification. It might as well be specifying ‘meat’.” If you see a recipe that says to add sea salt to eggs before whisking…. you can be sure it was written by someone who needs to learn more about the ionic bonds that hold sodium and chlorine together.
Sugar: Eggs, flour and sugar are the primary ingredients of a great many deserts. Remove the flour and you end up with neither desert nor scrambled eggs – at least not from a purist scramble perspective. What you do end up with is a kind of specialty egg dish that deserves further exploration in the field of breakfast. It’s not fair to call them scrambled eggs, but their sweetness makes them an interesting complement to pancakes and waffles
What NOT to do
Don’t beat egg whites until stiff peaks form
With or without added ingredients like sugar and cream of tartar, the result of scrambling looks like a big dollop of melting Crisco crossed with cottage cheese.
Don’t stir eggs slowly for an extended period
I came across one recipe that actually instructed to stir the eggs in the fry pan (heated at your stove’s lowest setting) with a wooden spoon for 30 minutes.
First of all, the eggs didn’t set after 30 minutes at the lowest heat setting. I tried once more at a slightly higher setting. After 10 minutes, the eggs began to show subtle signs of setting. I continued to stir the eggs in the pan for 10 minutes. The result looked more like butternut squash than any eggs I’ve ever seen. The texture was close to chewy and the extended cooking time seemed to have cooked away all the flavor of egg.
Do it or don’t – It doesn’t make a difference
Keep eggs at room temperature before scrambling – Kitchen tests showed no significant difference between room-temperature and refrigerated eggs from the same carton. Refrigeration actually deters the growth of salmonella enteritis. Even though salmonella is very rare (1 out of every 20,000 eggs may contain the bacteria), it is advised that your eggs always remain stored in the refrigerator.
The art of scrambling
One of the most important ingredients in scrambled eggs is hardly ever mentioned… air. It would be nice if we could just dollop a Tablespoon of air into the mixing bowl, but for the time-being, incorporating air into beaten eggs requires good old-fashioned elbow grease (or the electric equivalent).
The more you whisk the more air bubbles become trapped in the shaken and unraveling protein of the eggs. As the eggs cook, protein molecules firm-up around the air bubbles resulting in a spongy texture and hopefully full and fluffy scrambled eggs.
The American Egg Board describes well-beaten eggs as “frothy and evenly colored”. When your eggs match that description (generally after about 2 minutes) you should stop beating.
Over-beating will completely unravel the protein molecules and destabilize their ability to form a microscopic casing around the air. In terms of whisking motion, a tilted wheel motion works far better than a vertical stirring motion. A fork works as well as a whisk but requires a slight bit more time and energy.
The best way to scramble in the pan
The actions you take once the eggs hit the fry pan will dictate the size of the scrambled egg pieces (curds). Some recipes suggest stirring the eggs with a wooden spoon immediately as the eggs hit the heated surface. Others direct you to let the eggs start to set before stirring/scrambling. Of the two, the second method results in larger fluffier pieces.
Getting hungry?
Before we scramble our brains contemplating the best plate to eat scrambled eggs off of, the texture differentials of eating with a spoon and the ideal temperature of the chair you sit in as you eat… let’s get back to the reason we’re here. For your breakfast pleasure:
Ingredients:
6 large eggs
6 teaspoons (1 teaspoon for each egg) low-fat milk
3 dashes of salt (1 dash for every two eggs)
1 tablespoon butter for frying
Directions:
Heat a large non-stick frying pan to a setting just above medium. A 12-inch pan works well for 6 eggs. Do not add butter yet. We just want get the pan ready.
In large metal or glass mixing bowl, whisk the eggs with the milk and salt. Beat vigorously for 2 minutes.
Alternatively, you can place the eggs, milk and salt in a blender and blend for 20 to 25 seconds. Allow the mixture to set for a couple minutes to let the foam settle.
Melt the butter in the frying pan. As the very last of the butter is liquefying, add the egg mixture.
Do not stir immediately. Wait until the first hint of setting begins. Using a spatula or a flat wooden spoon, push eggs toward center while tilting skillet to distribute runny parts.”)
Continue this motion as the eggs continue to set. Break apart large pieces as they form with your spoon or spatula. You will come to a point where the push-to-center technique is no longer cooking runny parts of the egg. Flip over all the eggs. Allow the eggs to cook 15 to 25 seconds longer. Transfer eggs to serving plates. Add salt and pepper to taste.
US Cuisine Related Articles
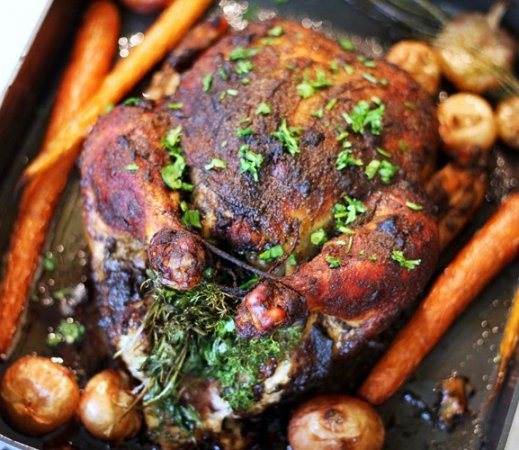
Non-Traditional Turkey
Deep Fry Turkey
Ingredients:
3 gallons peanut oil for frying, or as needed
1 (12 pound) whole turkey, neck and giblets removed
1/4 cup Creole seasoning
1 white onion
Directions:
In a large stockpot or turkey fryer, heat oil to 400 degrees F. Be sure to leave room for the turkey, or the oil will spill over.
The easiest way I’ve found to determine the amount of oil you need is to place the turkey into the fryer and fill with water until the turkey is just covered. Remove turkey and allow to drain, pat dry with paper towels as well. Make note of the level of water in the fryer. Discard water and dry thoroughly. Fill frying vessel with oil to the level as noted above. This should help in preventing hot oil spill overs.
Layer a large platter with food-safe paper bags. Rinse turkey, and thoroughly pat dry with paper towels. Rub Creole seasoning over turkey inside and out. Make sure the hole at the neck is open at least 2 inches so the oil can flow freely through the bird. Place the whole onion and turkey in drain basket. The turkey should be placed in basket neck end first. Slowly lower basket into hot oil to completely cover turkey. Maintain the temperature of the oil at 350 degrees F, and cook turkey for 3 1/2 minutes per pound, about 45 minutes. Carefully remove basket from oil, and drain turkey. Insert a meat thermometer into the thickest part of the thigh; the internal temperature must be 180 degrees F.
Finish draining turkey on the prepared platter.
Grilled Whole Turkey
Ingredients:
12 pounds whole turkey
2 cups water
3 tablespoons chicken bouillon powder
2 teaspoons garlic powder
2 teaspoons onion powder
1 teaspoon poultry seasoning
1/2 teaspoon chopped parsley
1 teaspoon paprika
Directions:
Prepare an outdoor grill for indirect medium heat, and lightly oil grate. Rinse turkey, and pat dry. Place turkey breast side down on the prepared grill. Sear turkey on both sides until skin is golden to dark brown. In a large roasting pan, mix together the water, bouillon powder, garlic powder, onion powder, poultry seasoning, parsley, and paprika. Place turkey breast side down in the roasting pan. Scoop the pan mixture over the turkey. Cover tightly with foil and place on grill. Grill 3 to 4 hours, until the internal temperature of the thigh reaches 180F. Remove turkey from grill and let stand 15 minutes before carving.
US Cuisine Related Articles
Magic Baked Salmon
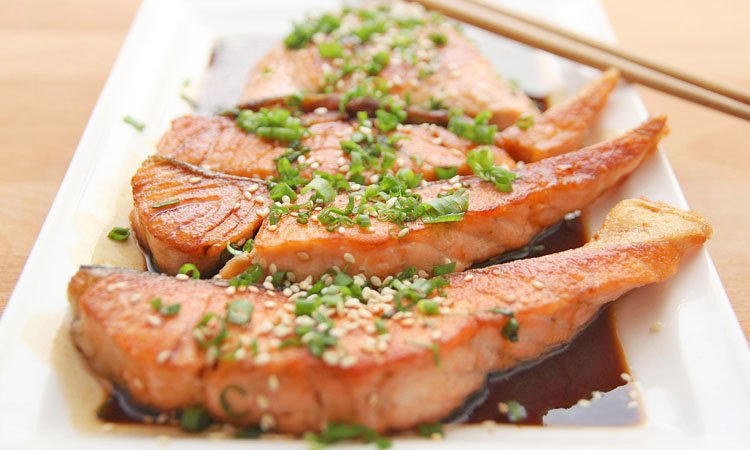
Salmon has become one of the most popular fish to serve. People love the taste, and salmon cooks quickly, making it a great option for both weeknights and weekends.
If you want to prepare salmon, remember to purchase the freshest fillets you can. Keep the fish refrigerated until you are ready to cook it, and always prepare it on a clean, dry surface. In order to eliminate a strong oily taste, remove the skin as soon as possible.
If you are looking for a great way to liven up your salmon dish, you may want to try my Salmon Magic. This seasoning blend is a flavorful combination of dill, mustard seed, herbs and spices with just the right amount of salt and sugar, creating a versatile blend for all salmon recipes.
The distinct flavors enhance the natural goodness of salmon or any other type of fish, shellfish or seafood. Whether you are grilling, sauteing, baking, broiling or poaching, Salmon Magic will add just enough flavor.
To get you started, here is one of my favorite salmon recipes. It’s simple, and it will definitely spice up mealtime.
Ingredients:
1 salmon fillet
2 teaspoons Salmon Magic
Unsalted butter, melted
Directions:
Heat oven to 450 F. Lightly brush the top and sides of the salmon fillet with melted butter. Lightly brush a small sheet pan with melted butter.
Season the top and sides of the salmon fillet with the Salmon Magic. If the fillet is thick, use a little more Salmon Magic. Press the seasoning in gently.
Place the fillet on the sheet pan and bake until the top is golden brown, and the fillet is just cooked through. In order to have moist, pink salmon, do not overcook. Serve immediately.
US Cuisine Related Articles
Tomato Strata Florentine

PBS Food: Kale and sun-dried tomato strata
Ingredients
Cooking spray
2 cups torn fresh spinach (about 4 oz.)
2 slices whole wheat bread, cubed (about 1 1/2 cups)
1 cup chopped fresh tomato (about 1 medium)
1 teaspoon Italian seasoning, crushed
4 eggs
1 cup skim or low-fat (1%) milk
1/4 cup (1 oz.) shredded low-moisture, part-skim mozzarella cheese
Directions
For individual cups: Evenly coat 4 (10-ounce) custard cups with spray. Place 1/2 cup of the spinach in each cup. Sprinkle each with about 1/3 cup of the bread cubes. In medium bowl, stir together tomato and seasoning until tomato is evenly coated with seasoning. Spoon 1/4 cup tomato mixture over bread cubes in each cup. In medium bowl, beat together eggs and milk. Slowly pour scant 1/2 cup egg mixture over tomato mixture in each cup. Sprinkle each with 1 tablespoon of the cheese.
Bake in preheated 350 degree F oven until custards are puffed and begin to pull away from sides of cups and knife inserted near centers comes out clean, about 30 minutes.
For baking pan: Layer entire amounts of all ingredients as above in sprayed 8 x 8 x 2-inch baking pan. Bake as above.
Nutritional information for 1 serving of 1/4 recipe using skim milk: 175 calories, 8 gm total fat, 218 mg cholesterol, 238 mg sodium, 469 mg potassium, 14 gm total carbohydrate, 13 gm protein and 10% or more of the RDI for vitamins A, B12 and C, riboflavin, calcium, iron, phosphorus, and zinc.
US Cuisine Related Articles
- Braising 101
- California-Style Buttered Pasta
- Creamy Fresh Leek Soup
- Creating the Classic Cheeseburger
- Delicious Easy Parsley Potatoes
- Hot N’ Spicy Chicken Wings
- How to Cook a Tender Juicy Steak
- Magic Baked Salmon
- Mouth Watering Memphis Style Pork Ribs
- Non-Traditional Turkey
- Perfect Scrambled Eggs
- Tomato Strata Florentine
- Top 10 Best Chili Dishes